Ever wonder why your AC throws a tantrum right when the sun’s blazing down on Huntington Beach? The answer isn’t a broken thermostat—it’s a testing shortcut most pros keep under wraps.
Most HVAC companies skim the checklist, skipping the deep‑dive diagnostics that catch hidden leaks, airflow bottlenecks, and sneaky efficiency killers. When you skip the real test, you’re paying for a band‑aid instead of a long‑term fix.
Ready to see what the industry doesn’t want you to know and how to demand a proper inspection? Keep reading and you’ll learn the exact steps to make sure your system runs like a champion all summer long.

The Real Price of a Shortcut: Why Incomplete Testing Costs You More
When a tech skims the checklist, you’re not saving money—you’re signing up for a cascade of repairs that will hit your wallet later. A half‑done test may get the unit humming for a week, but the hidden problems keep eating energy, blowing up parts, and demanding emergency calls when the heat spikes.
Hidden Costs You Won’t See on the Invoice
- Premature compressor failure – a tiny refrigerant leak missed today becomes a $2,000 replacement tomorrow.
- Increased utility bills – undetected airflow restrictions force the system to work harder, spiking your monthly spend.
- Frequent service calls – each “quick fix” adds labor fees that add up faster than you think.
Bottom line: a shortcut today is a bill tomorrow. Insist on a full diagnostic, and you’ll keep the AC running smooth while protecting your budget from surprise expenses.
Step‑by‑Step Breakdown of a Comprehensive HVAC Diagnostic Inspection
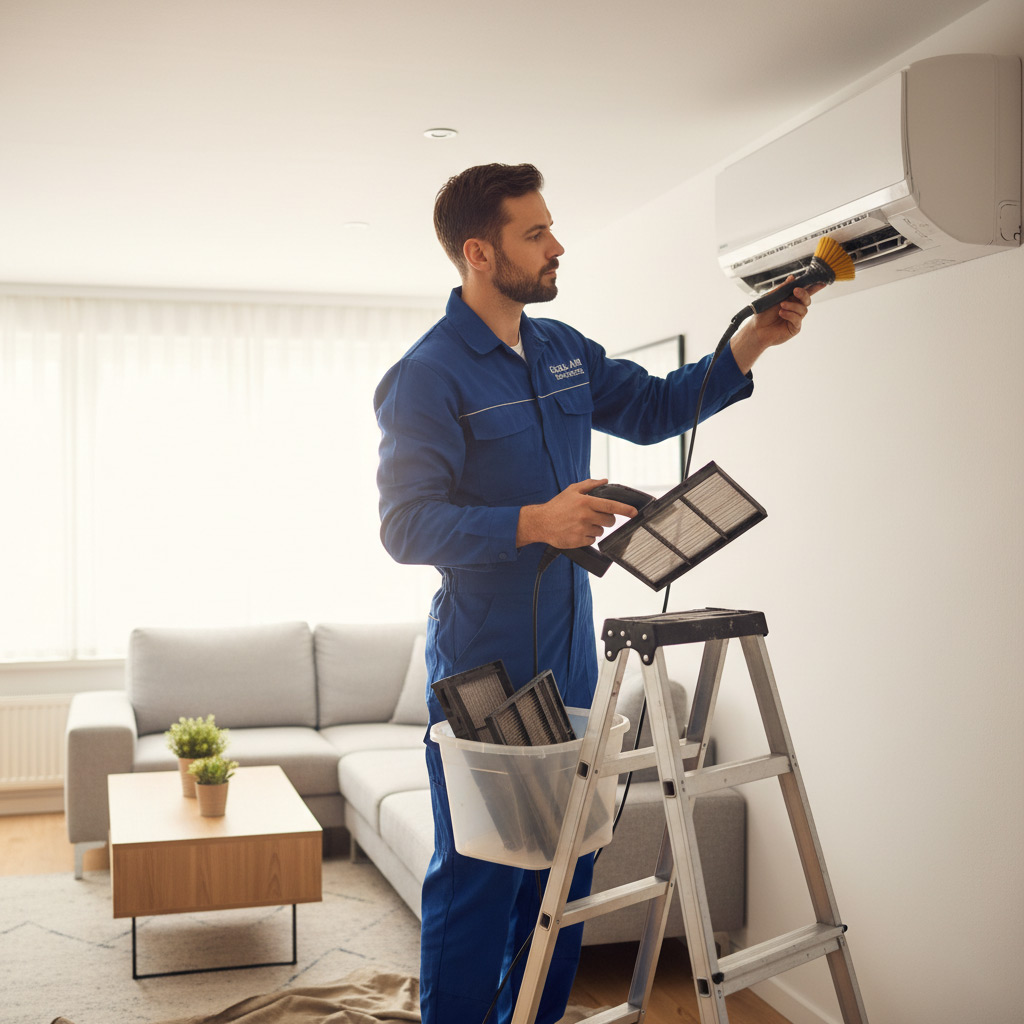
1. Visual Walk‑Through & Safety Check
First, the tech does a quick sweep of the outdoor unit, indoor coil, and all visible wiring. Loose bolts, rust, or cracked insulation are red flags that can turn a simple fix into a costly repair.
They also confirm that the breaker size, gas line pressure, and refrigerant levels are within the manufacturer’s safety envelope before moving on.
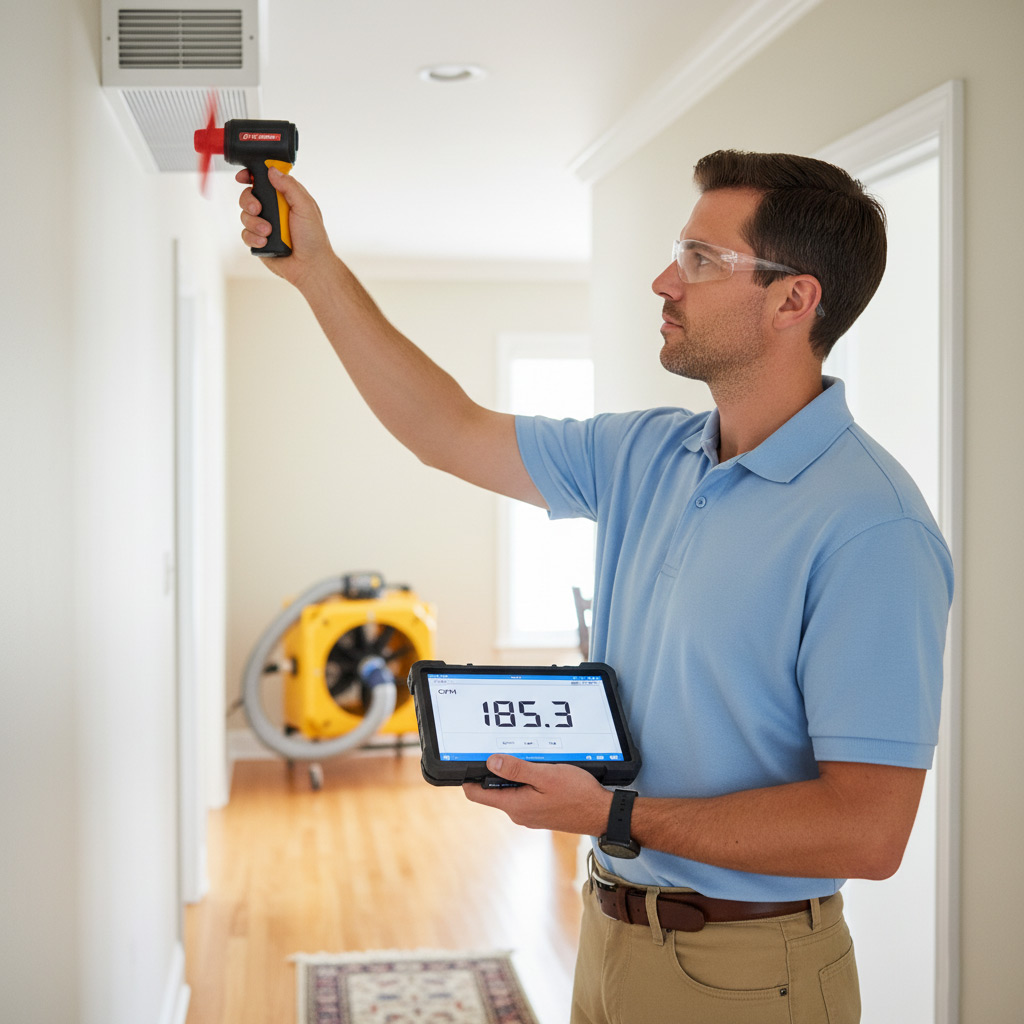
2. Airflow & Temperature Mapping
Next, a calibrated anemometer and digital thermometer are clipped to each register. This tells you exactly how much air is moving and whether the temperature drop meets specs.
- Supply & return CFM – compare to design values
- Temperature delta across the evaporator coil
- Identify rooms that stay warm despite the fan running
If any reading is off, the technician pinpoints the blockage, duct leak, or dirty filter that’s choking the system.
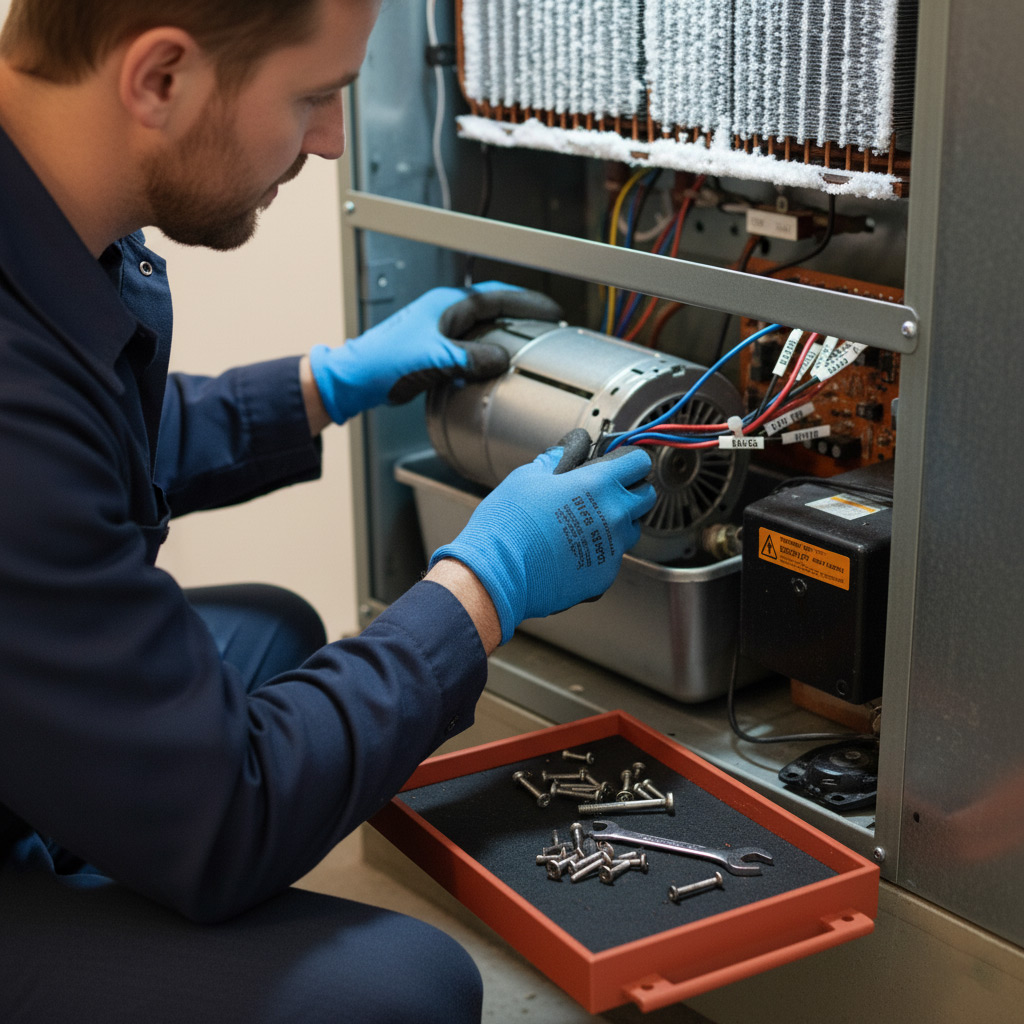
3. Refrigerant & Electrical Diagnostics
A manifold gauge set reads suction and discharge pressures while the compressor is humming. Those numbers expose hidden leaks or an over‑charged charge.
Simultaneously, a multimeter checks voltage, resistance, and continuity on the compressor, fan motor, and thermostat circuit. Bad readings here mean you’re looking at a failing component, not just a dirty coil.
When airflow, refrigerant, and electrical data all line up, you finally see the full story behind that summer‑day sweat.
Must‑Have Tools & Instruments Every Pro Should Use (and What They Reveal)
When a tech walks in with a toolbox that looks like a junk drawer, you know they’re cutting corners. The right gear tells a story about your system that a quick glance can’t. Below is the kit that separates a true pro from a shortcut‑artist.
Thermometers & Psychrometers
These devices measure temperature and humidity at the same time. They expose hidden temperature swings that cause your AC to work overtime.
- Digital thermometer – snaps a reading in seconds, shows if the coil is too hot.
- Psychrometric chart – translates raw data into dew point, revealing moisture problems.
- Infrared laser thermometer – spots hot spots without touching the duct.
Manometers & Leak Detectors
Pressure tells you if the refrigerant loop is sealed. A low reading means a leak; a high reading means a blockage.
- Digital manometer – reads static pressure, helps balance airflow.
- Electronic leak detector – sniffs out HFC leaks that the naked eye misses.
- UV dye kit – adds color to the refrigerant, making leaks glow under a UV lamp.
Airflow Meters & Duct Analyzers
Airflow is the lifeblood of any HVAC system. Without enough CFM, even a brand‑new unit will feel weak.
- Handheld anemometer – measures CFM at each register, flags bottlenecks.
- Duct pressure gauge – shows where static pressure builds up, pointing to dirty filters or undersized ducts.
- Smoke pencil – visualizes airflow patterns, catching leaks in the return plenum.
Red‑Flag Findings: Hidden Leaks, Airflow Bottlenecks, and Efficiency Killers
Hidden Leaks
Even a tiny puncture in the refrigerant line can turn a cool breeze into a scorching nightmare. Most homeowners never see the leak because the pressure drop is subtle until the system overheats.
Pro technicians use a UV dye and electronic leak detector to expose the culprit. The result? A pinpointed repair that stops the loss before it drains your wallet.
- UV dye reveals cracks invisible to the naked eye.
- Electronic detectors catch low‑level leaks that a pressure gauge misses.
- Fixing the leak restores proper cooling capacity.
Airflow Bottlenecks
Blocked ducts or a dirty coil act like a choke on a race car—speed drops, heat builds. One clogged register can ruin the whole system’s balance, especially in a coastal climate where salt can corrode fins.
Thermal imaging cameras and anemometers measure the exact flow at each vent. When the numbers don’t match the design specs, you’ve got a bottleneck.
- Check for dust, pet hair, or mold in registers.
- Inspect duct seams for leaks that steal air.
- Clean coils to restore smooth passage.
Efficiency Killers
Old capacitors, mis‑sized compressors, or a thermostat set to “auto” in the wrong spot can sap power faster than a leaky faucet. These silent saboteurs show up as higher electric bills, not as a broken unit.
A quick power draw test and a review of the system’s SEER rating reveal whether the unit is working at its promised level.
- Capacitor health check prevents motor burnout.
- Verify compressor size matches square footage.
- Ensure thermostat placement avoids false readings.
How to Verify Your Technician’s Results and Hold Them Accountable
First thing you need is a paper trail. A reputable tech will hand you a detailed report that lists every measurement, pressure reading, and visual finding. If they hand you a vague “everything looks good” note, ask for the data again – you’re not paying for guesswork.
Ask for the Numbers
- Refrigerant charge: psi and temperature delta.
- Static pressure on each coil: compare to manufacturer specs.
- Airflow rates at each register: CFM readings.
- Thermostat calibration: set point vs. actual room temp.
When the tech writes these down, you can cross‑check with your own handheld gauge or a quick phone app. It’s a simple way to catch a shortcut before it becomes a bill.
Spot‑Check the Results
- Turn the fan on and feel for consistent airflow across the house.
- Listen for unusual hissing or rattling – signs of a leak or loose component.
- Watch the thermostat display for a stable temperature swing of no more than 2‑3°F.
If anything feels off, call the company back and demand a re‑inspection. A pro who stands behind their work will schedule a follow‑up without hesitation.
Finally, put a deadline on the fix. Tell the technician you’ll review the report within 48 hours and that any discrepancy will be escalated to the manager. Clear expectations keep the crew honest and your AC humming all summer.
Case Study: Transforming a Failing Huntington Beach AC into a Summer Champion
When the Johnson family called, their 12‑year‑old split‑system was sputtering on a 92‑degree day. The unit shut down mid‑cycle, leaving the living room a sauna. We knew a quick patch wouldn’t cut it.
The Diagnosis
Our tech ran a full diagnostic sweep, not the usual “check the thermostat” routine. The data revealed three silent killers:
- Refrigerant leak in the low‑side line – loss of cooling power.
- Clogged evaporator coil – airflow bottleneck.
- Worn‑out blower motor bearings – excess vibration and noise.
Each issue alone would have been easy to miss. Together they were draining the system’s performance and driving up the electric bill.
The Fix
We tackled the problems in a logical order, swapping parts and re‑charging the system. The steps were:
- Locate and seal the refrigerant leak with a certified refrigerant recovery unit.
- Clean the evaporator coil using a low‑foam, non‑corrosive cleaner.
- Replace the blower motor and install a new, balanced fan blade.
- Run a post‑repair performance test to verify SEER ratings and airflow.
After the work, the Johnsons reported a crisp 72‑degree indoor temperature within minutes. Their energy bill dropped 18% the next month, and the unit has run flawlessly all summer. Proof that a thorough test beats a shortcut every time.
Final Words
When you walk away from a diagnostic, you should feel like you’ve got a roadmap, not a mystery. Ask for the written report, check the timestamps, and compare the findings to the checklist we broke down earlier. If anything feels vague, demand clarification on the spot.
Quick Action Checklist
- Get a copy of the HVAC Testing and Inspection report.
- Verify that the technician logged pressure readings, airflow measurements, and leak detector results.
- Cross‑check each item with the “Must‑Have Tools” list we covered.
Remember, a solid inspection is an investment, not an expense. The moment you start treating it like a line‑item on a budget spreadsheet, you’ll end up paying for repeat calls, higher utility bills, and a unit that never reaches its peak performance.
People Also Ask
What does a full HVAC diagnostic inspection include?
A comprehensive inspection covers refrigerant levels, thermostat calibration, duct leakage, airflow measurements, and electrical safety checks. It also evaluates system efficiency and identifies hidden wear that could cause future failures.Why do some technicians skip certain HVAC tests?
Technicians may skip steps to save time or reduce labor costs, hoping the issue appears minor. This shortcut often leads to missed problems that become expensive repairs later.How can I confirm my HVAC technician performed proper testing?
Ask for a detailed report that lists pressure readings, airflow data, and any code‑compliant measurements. Compare the results with manufacturer specifications or request a second opinion if anything seems off.What are the most common hidden issues found during HVAC testing in Huntington Beach?
Typical red‑flags include refrigerant leaks, clogged or undersized ducts, and dirty coils that lower efficiency. These problems are often invisible without pressure gauges and airflow meters.Is it worth investing in higher‑end testing tools for my home HVAC system?
Yes, advanced tools like digital manifold gauges and infrared thermometers provide precise data, helping prevent costly breakdowns. Accurate diagnostics also ensure your system runs at optimal efficiency, saving energy bills.Huntington Beach HVAC brings over two decades of residential and commercial climate‑control expertise to the Huntington Beach community. Their team of certified technicians delivers reliable heating, cooling, and ventilation solutions tailored to the coastal climate. Committed to responsive service, they prioritize energy efficiency and comfort for local homeowners and businesses.
Need HVAC?
We provide fast, results‑driven solutions for homes and businesses in Huntington Beach and nearby ZIPs (92646, 92648, 92649, 92618, 92615). Our team completes projects on schedule, so you can move forward without delay.
Get HVAC Quote